Posted by: mick | December 15, 2013

More Baby Knits

I’ve knitted two more hats for two more new babies!

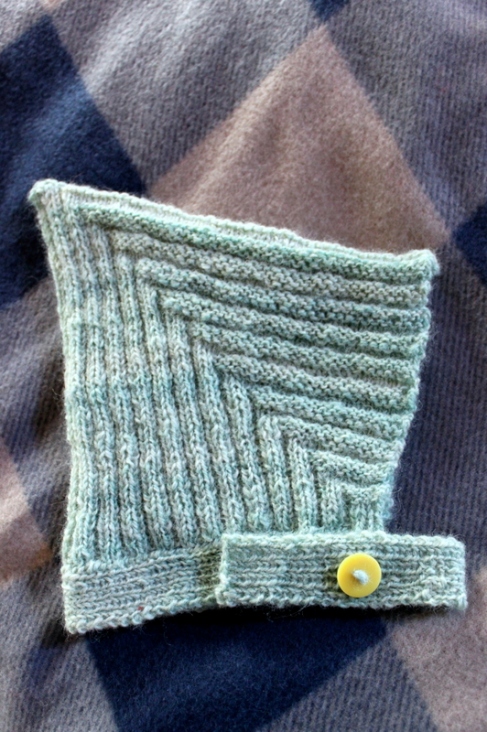
Baby knit the first:

Image

Pattern: Stella Pixie Hat by Kristen Rengren

Yarn: My handspun BFL fingering weight

Needles: US 1

Began: October 1, 2013; Completed: December 1, 2013 (Raveled here.)

Notes:  This hat didn’t take nearly as long as it says up there;  I finished the hat, then completely zonked out on the neckband as I worked on other things.  The pattern is really clever, and I love the finished object.  This was knitted with RangerSarah’s wee babe in mind, and it should fit her eventually.  I’m the worst at checking gauge for baby knits because I figure it’s better to be too big than too small!

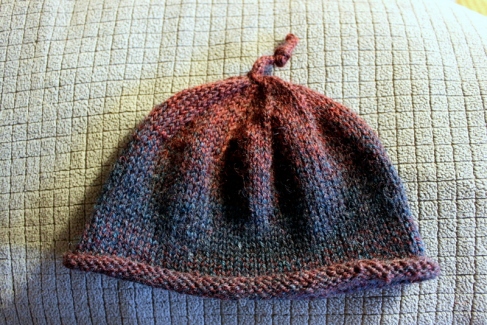
Baby Knit the Second:

Image

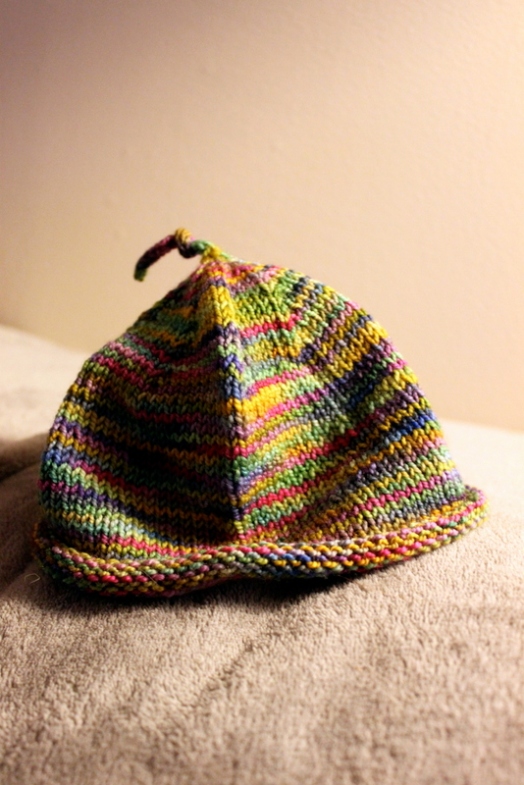
Pattern: Easy Peasy Newborn Sock Hat by Keri McKiernan

Yarn: JoJoLand Melody, one of the oldest yarns in my stash

Needles: US 2

Began: November 13, 2013; Completed: November 20, 2013 (Raveled here.) 

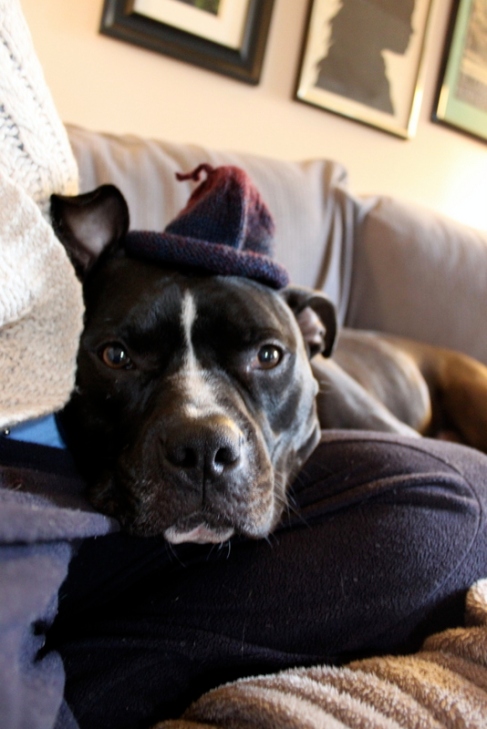
Notes:  This hat was whipped up quick like a bunny for a co-worker, and I’m glad it went quickly: her little boy entered the world the day after I gave her the hat.  I kind of love these dark, sophisticated colors for a winter baby.  Just like the first, this hat was super easy.  

Image

I think I need to find a new model for baby hats.

Posted by: mick | November 17, 2013

FO: Easy Peasy Newborn Sock Hat

Yes, you read that right.  I actually knitted an object.  Behold!  The tiny hat!


Image

Pattern: Easy Peasy Newborn Sock Hat

Yarn:  Super old KPPPM from my stash circa 2006.  No idea what colorway.

Needles:  US 2 DPNs

Began:  October 30th-ish; Completed: November 3rd?  

Notes:  This hat was super easy and a great stash buster.  The result is quite adorable, and my office-mate loved it.  He and his wife just had a baby girl, and obviously that means she needed to receive a hand knit.  I’m actually knitting this pattern again right now for another coworker.  In other news, pretty much everyone I know is pregnant.  Moar baby knits!

Posted by: mick | September 2, 2013

Is this thing on?

So, life has been rather insane lately.  To make a long story short, I went through a lengthy application/interview process last year and was offered a job as an assistant professor at an amazing community college!  I’m thrilled about this move for many reasons: the college and faculty are absolutely incredible; the area is a much better fit for J and my ideals; it’s the community college in my hometown county, which means living much closer to my family; we’re close to Philly and all it has to offer!

So while I wasn’t blogging in the past six months, I was doing lots of insane things like spending every weekend getting our darling home ready to put on the market, selling said home (yay!), and looking for a new place to live in our new town.  

This means that any knitting/sewing/crafting energy was sapped up by tons of yard work, painting, packing, leaving the house at the drop of a hat for many showings, and having a yard sale.  We were extremely lucky to sell our house quickly, and while I’m really excited about exploring and getting reacquainted with our new area (I haven’t lived here since 1999!), I really miss the house we put so much love into.  We bought that house never intending to leave it, but life sure does take us funny places!

We’re currently renting while we look for a new place to hopefully purchase, so all of our energy is really focused on getting to know the area and deciding where we’d like to live.  Oh and, you know, working at that shiny new professor job 🙂  Never fear that I’ve begun settling in and am even doing a little knitting!  In the meantime, here are a few shots of what we’ve been up to.

Enjoying the deck at the new place: 

Image


Image

Grilling lots of pizzas:

Image


Spending time with my mama, who is now our neighbor!:Image


Posted by: mick | March 5, 2013

FO: Handspun Muji

Muji Wrap

Pattern: Muji Painting by Lies Vandesande

Yarn: My own handspun Superwash BFL singles, about 830 yards

Needles: US 5 Addi Lace Turbos

Began:  July 14, 2012;  Completed:  October 21, 2012 (Raveled here.)

Handspun Muji

Notes:  There’s not much to say about this pattern.  I didn’t even check gauge; just grabbed my favorite US 5 Addi lace turbo, cast on, and knitted.  I knitted and knitted, throwing in the occasional garter row or two whenever I felt like it, until I ran out of yarn.  I wish it were a little bit longer before grafting as the result is really scrunchy, but I still love the result.  Easy peasy and very soft and warm!

Squishy Muji

Posted by: mick | January 16, 2013

Gifties: Part 3

AKA Gifties for Me!

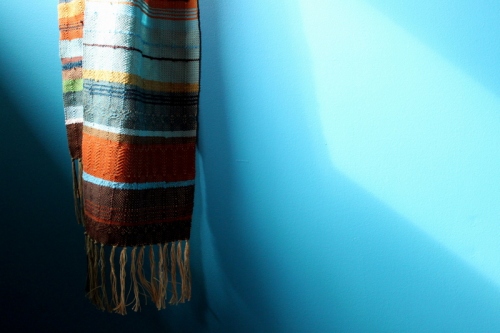
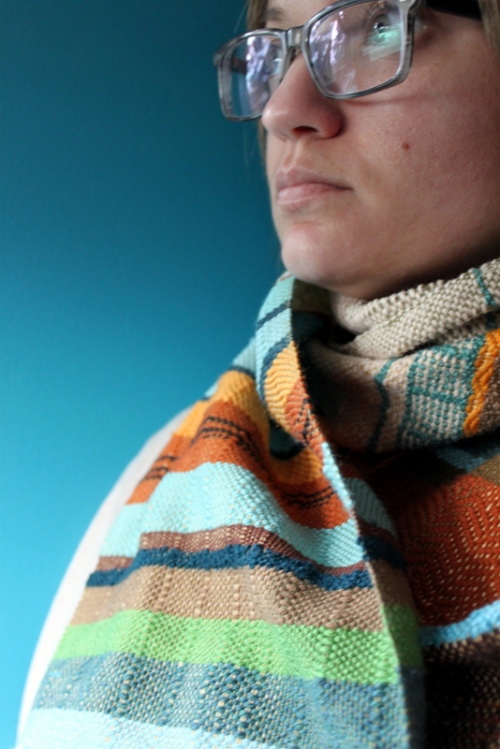
I’ve been really admiring weaving for a few years now, but I just can’t justify starting up another fiber craft.  About a year ago, whilst perusing Etsy for a gift, I stumpled upon Vanessa’s shop, pidgepidge, and I was blown away.  Each handwoven scarf was more beautiful than the next, but I particularly loved one entitled “Sedona,” which I’d visit periodically, petting my monitor and calling it my precious.  Eventually, it sold, and I was really bummed.  But, you know, life went on and stuff.

Then, I was fortunate enough to be given some money for my birthday, and while I usually end up buying something fun for the house with extra gifty cash or squirreling it away in my savings, I took the plunge and messaged Vanessa about a custom scarf.  She was incredibly kind and very quick to respond, and we worked together to come up with a colorway that was similar to Sedona but didn’t contain alpaca or angora, which make me break into hives like crazy.

pidge pidge custom scarf

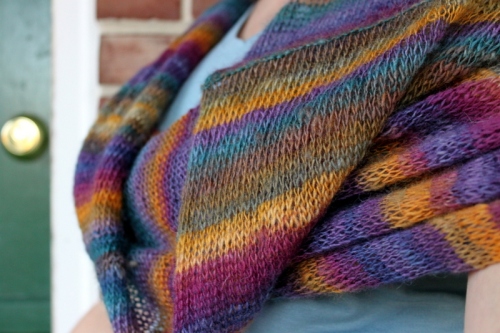
She warned me that it would take some time since she was swamped, but I still got the scarf in about a month.  I was impressed by her speediness and her willingness to accommodate my weird allergies, and then I got the scarf, and I couldn’t believe its beauty.  I wear this all the time, probably more than any scarf I’ve knitted for myself.  The color and texture are stunning, and it goes with pretty much everything I own.  I get compliments every time I wear it, and it’s the perfect length.  I love this scarf.  And now, I’m looking at looms.

modeled pidgepidge

Posted by: mick | November 14, 2012

Gifties: Part 2

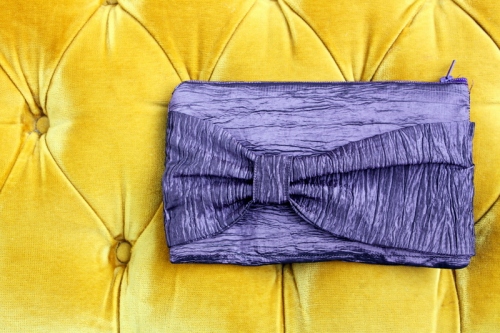
One of my favorite people on this earth, my cousin D, is getting married in January.  While I’m happy to grab something off of a registry and give people what they really want or need, I wanted to get something a little more personal for D since she was in my wedding and has always been made of 100% awesome.  I got the crazy idea of making her a cute clutch in her wedding colors that she could use on her day to hold little things she might need.  I picked out a pattern, took my tightly-clutched coupons to the fabric store, came home with enough to make this adorable bow clutch, and sat down for a few hours to knock this out.

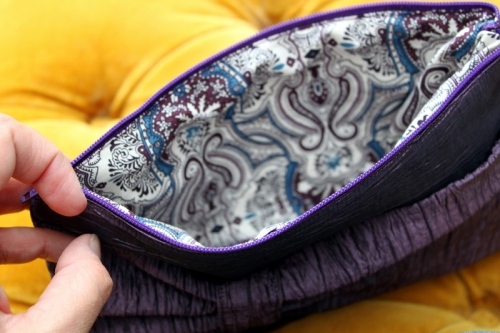
While it turned out cute, I had a few problems.  They were entirely of my own doing, which I’m sure will shock you.  First, my cousin’s colors are eggplant and champagne.  After a maddening twenty minutes of grabbing every shade of off-white fabric and harassing the staff at the store with my incessant and increasingly frantic insistence of “Is this champagne?  IS THIS?!” I spotted this crinkly mystery fabric in the remnants pile.  It’s dark purple, which is eggplant to me, and it’s fancy shmancy.  (This is from a girl who thinks jeans and a sweater is dressy.  Give me a break.)  I bought it up, snatched some paisley with eggplant, off-white, and blue (Something blue! Score!), and went home before considering something really important.  The pattern calls for fusible interfacing, which will make my crinkly fabric decidedly uncrinkly.  Womp womp.

Undeterred, I thought on it a bit, and came up with a plan.  First, I cut some scrap fabric in the same shape as my interfacing, but left about a half inch allowance on all sides (in other words, I cut it one inch smaller on width and length).  Then, I centered the scrap fabric on my interfacing and fused the interfacing to it, being careful not to get the sticky stuff on my iron.  This left a half inch of exposed  interfacing sticky side on each edge of the scrap fabric.  Next, I carefully put this fabric with sticky edges down onto my crinkly fabric and ironed just around the edges, thereby attaching the interfacing by fusing the edges that wouldn’t be seen anyway and leaving the middle satisfyingly crinkled.  Huzzah!

The other problem is that I’m an idiot, and the pattern assumes basic sewing skills.  I turned everything right side out, only to find the super cute handle on the inside.  A better cousin would have started from scratch, but the sun had gone down and the store was over 40 minutes away, so I hacked the handle off and called it a clutch (and a day).

I must say that I’m really pleased with the results.  Despite my very meager sewing skills, this turned out super cute.  For the rest of the gift, I went to Target and got sample sizes of random things like deodorant, a sewing kit, band aids, hairspray, clear nail polish, etc. and filled the bag with them.  Instant wedding day emergency kit!  All in all, it was really fun and quick to make, and I’m proud of my ability to improvise a solution to a self-imposed sewing problem.  My cousin seemed to really like it, too.  Win/win!

Posted by: mick | October 31, 2012

Gifties: Part 1

I don’t know if this is true for you, but it seems I’m at the age where everyone I know is having babies.  (A few years ago, everyone I knew was getting married.  Go figure.)  This fills a knitter with glee, of course, and I love plotting for the wee ones that keep entering my life with chubby adorable rapidity.

When one of my favorite couples in the world announced they were expecting, they remained true to themselves and their commitment to non-materialism (Really, English prof?  “Non-materialsm”?  What the heck is the word for that?  Aescetism?) and requested that they not have a shower.  Some friends and family still wanted to send them some small gifts, however, so we decided to send them all to their place, far far away, so they’d arrive on one day.  Surprise present bombardment ftw!

I found out about this a few days before the proposed send date, so I came up with something quick and on the fly.  Knitting, while fun, is not best done when rushing like crazy, at least for me.  You know how people tend to give their baby-in-the-making a cute little name while he/she cooks?  Things like “Rabbit” or “Bean” or “Tadpole”?  Well, our friends started calling the baby Gary, for whatever reason, and it stuck.  It became even more hilarious when they discovered they were having a girl.  Finding this name delightful, I ran to Target for some plain onesies, stopped at Michael’s for some iron-on printables, and did some Google image searches.  The end result:

Yes, that is Gary Busey on a onesie.  It’s not easy finding a photo that captures his Busey-ness and isn’t too scary.  This falls nicely in the middle.  The others are  Gary the Snail and Gary Coleman, respectively.

This project was very quick and provided me, J, and the parents-to-be with lots of laughs.  I’ve been informed that the wee one, now born and being treasured as I type, will enjoy a Gary day a week.  If that doesn’t make a crafter happy, nothing will.

Posted by: mick | October 5, 2012

Sample Knits

The good news is that I got some extra work this fall; the bad side, however, is that I’ve had to take a hiatus from teaching knitting at my LYS.  They were very understanding, but I can’t wait to get back this spring.  In the meantime, I’ve been able to help them with a few shop samples.  I figured I’d post them here since they’re not very well-known patterns, and I loved them!

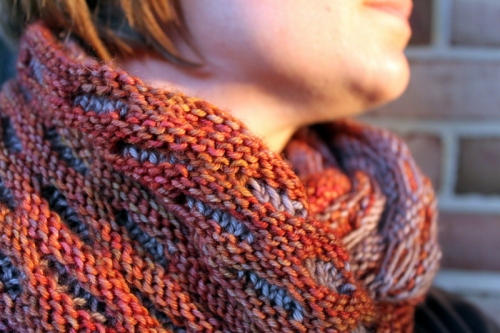
First up is the Bauhaus Cowl by Antonia Shankland (my project raveled here).  I used two shades of the recommended Madeline Tosh DK (Amber Trinket and Composition Book Gray), and it was a great, easy knit.  The pattern is easy to memorize, and it’s great relaxation knitting.  The cowl is more of an infinity scarf; the FO is nice and long, so you can wrap it around your neck at least twice, and it’s super warm from the stranding.  Love this scarf!

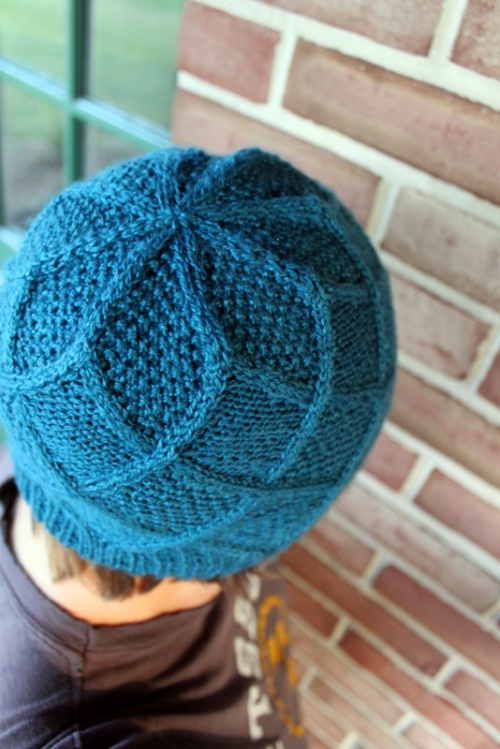
The second sample is Arncott by Jen Arnall-Culliford (Here’s my version).  This hat is fantastic.  I knitted this up in the recommended yarn, Fyberspates Scrumptious 4-pl in Teal, and though it was a little splitty, the FO is worth it.  The stitch definition is absolutely outstanding, and the resulting fabric is soft, vibrant, and extremely soft and comfy.  I’ve got enough yarn leftover to make one of these for myself, and that is definitely going on the docket.

I really love the crown decreases!  This pattern was also rather simple to memorize, which I never thought I’d say about a cable project.  I cabled without a needle, as per usual, with a quick refresher brought to me by Grumperina’s awesome tutorial.

So there they are.  Two cute samples that were really hard to give up.  I’m working on other knitting, too, but my work schedule makes it really tough to get any good knitting time in.  I’ll be back with another FO soon, I promise!  In the meantime, I hope this lovely autumn weather finds you snuggled up someplace warm with a cup of tea and a bunch of wool.

Posted by: mick | August 25, 2012

budget kitchen updates

When we moved into our house, I knew I wanted to update the kitchen.  It was in okay condition, but it was super dark; the original cabinets were a dull natural wood color, there was a gross soffit blocking out light, all of the woodwork was a dark taupe complimented by slightly lighter taupe walls, and the original knobs were super gross.  It had lots of potential, but it was really dingy.  The previous homeowners had redone the floors in a neutral greige tile and had installed grey corian counters, so we had some upgrades, but the rest was super dark and in desperate need of something brighter.

So, the day we closed, I started dismantling the cabinets for an upgrade.  We primed and painted them all, giving them a nice glossy white finish, and we spray painted all of the hardware a matte black.  The results were still a little bit country (We wanted to replace the hardware, but holy crap is that expensive!), but for about $100 or less, it made a huge difference.  We quickly set out to paint the walls, but just as quickly discovered that the previous owners painted over wallpaper.  Whilst trying to remove it, it became apparent that they actually wall-papered over plaster board that wasn’t sealed properly, which meant that our removal put giant dents in the wall.  Completely destroyed, we called it a day and saved up to have some professionals come in in the fall.  They patched the walls and removed the soffit (which turned out to be just plywood that had wallpaper on it.  WTF.), and it was a bit of an improvement.  Because of some previous water damage, though, we had to use some super duper heavy duty primer on the ceilings, and it was too cold at that point to open the windows for proper ventilation, so we lived with the kitchen as-was for several months.

Cut to a few weeks ago, when one day I’d had enough.  While J was out back chopping wood, I got out the primer, got everything out of the kitchen, and got to work.  J was insanely busy that week with meetings, so I primed and painted the. entire. kitchen. on my own.  Here’s what I did: patched the drywall holes in the ceiling, primed the entire ceiling and the walls above the chair rail, painted the ceiling a light aqua, painted the walls and cabinet backs in the same light grey as the living room (Olympic’s Thin Ice, which has had us singing this for over a year), and painted the chair rail and below the same glossy white as the cabinets.
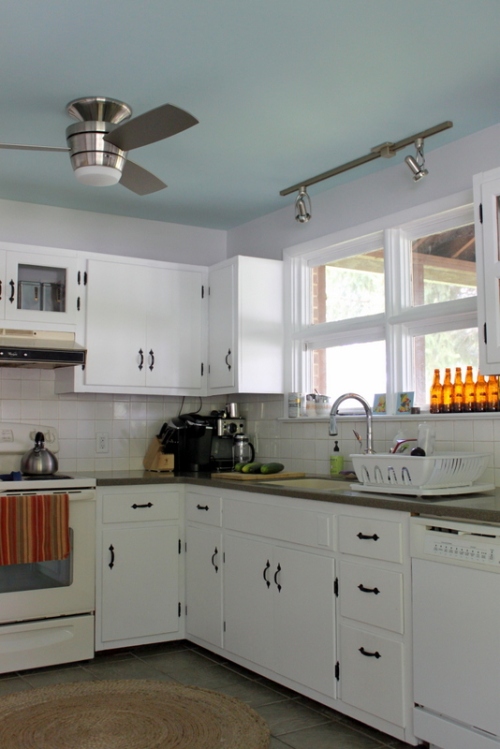
Then, J and I installed the new track lighting over the sink, he hung the new modern ceiling fan, and the new “chandelier” (aka warehouse lighting from Lowe’s).  It took a little over a week, but I took two days off due to meetings.  When we had family visit the following weekend, we spent a ton of time in the kitchen, and none of us could get over how bright it was.  Even just the white woodwork and trim reflects a ton more light than the old muddy water color, and cooking in there is an infinitely more pleasant experience.
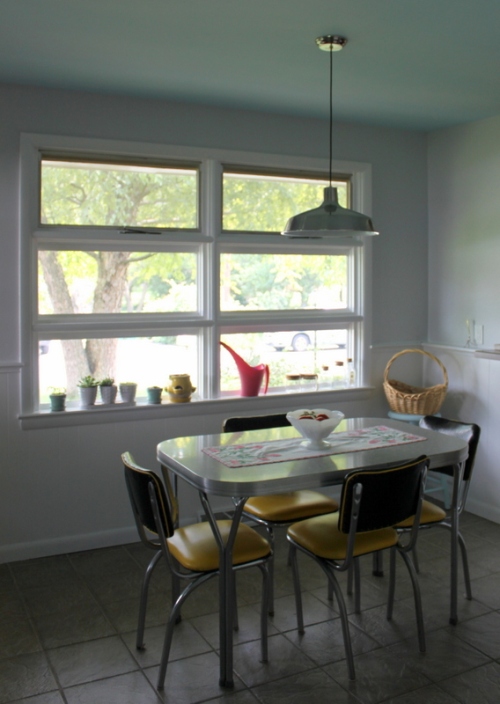
Of course, J and I knew that we wanted to add a bit more color, and we decided early on that yellow and red would be our accent colors to warm up the very cool palette.  We already have my yellow dinette set, my red Le Creuset dutch oven, and some vintage red canisters I bought myself for my birthday two years ago, and we found some adorable chevron fabric with those colors plus aqua and dark teal to make some curtains.  So, I spent a day last week getting some ready for the front and side windows (we left the dutch door uncovered for some light), and the room looks a lot brighter.  I really loved the light of the open front window, but we live across from a school so the curtains are necessary for privacy’s sake.  We keep them open all day, though, and we still get lots of light.

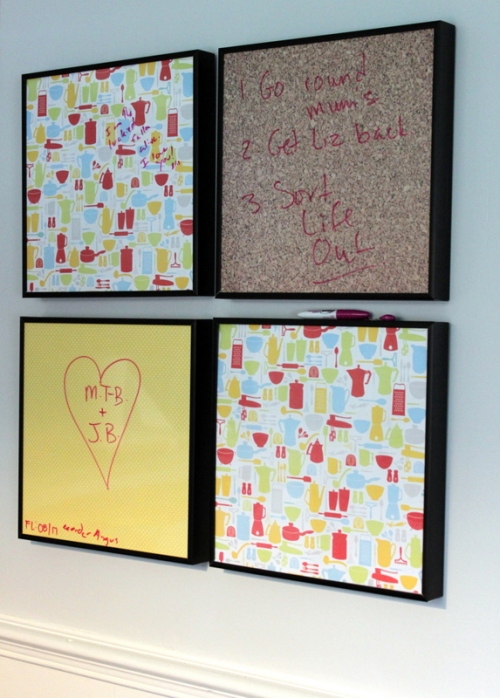
Then, we decided to do our little “art” project for the empty small wall that faces the window.  We went had ordered four square gallery frames from Blick last year, and then we headed to the craft store and picked out lots of different scrap-book paper options with which to fill them.  I definitely squealed when I spotted the kitchen pattern; it’s the perfect color combo!  We decided to do different patterns for the other two to mix it up, so one is a yellow polka dot while the other looks like corkboard.  We put them in the frames, hung them up, and now we’ve got four adorable white boards!  They’re great for making note of things like grocery needs or the dates of flea and tick meds (Yes, our lives are insanely glamorous), but we’ve also been having fun leaving each other little notes.  They make me smile whenever I walk by, and I love that they weren’t only really cheap, but they also will be fun to customize for holidays or just whenever we feel like it.  For less than a dollar apiece, we can have a whole new look!
So that’s it for us for a while, I think, but between the kitchen and the living room upgrades, our first floor is finally looking more like us!
Posted by: mick | August 6, 2012

Living Room Upgrades

Buying a house had been my biggest dream for years before we were able to make it  happen, which meant that, upon moving in, my head was full of ideas for decorating.  Unfortunately, I’ve still been unable to find a full-time position since we moved out here, so any really big projects like fencing in the yard or doing a full kitchen overhaul will have to wait for a while longer.  Instead of letting that get to me, I decided to do a few, relatively inexpensive upgrades this summer to inspire me and make me smile.

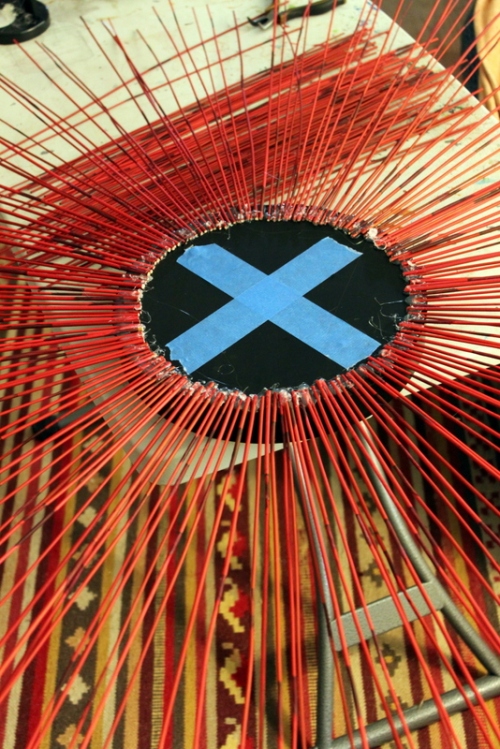
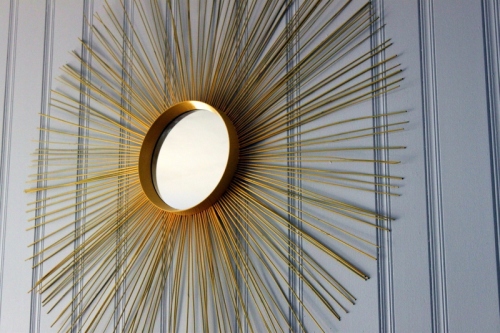
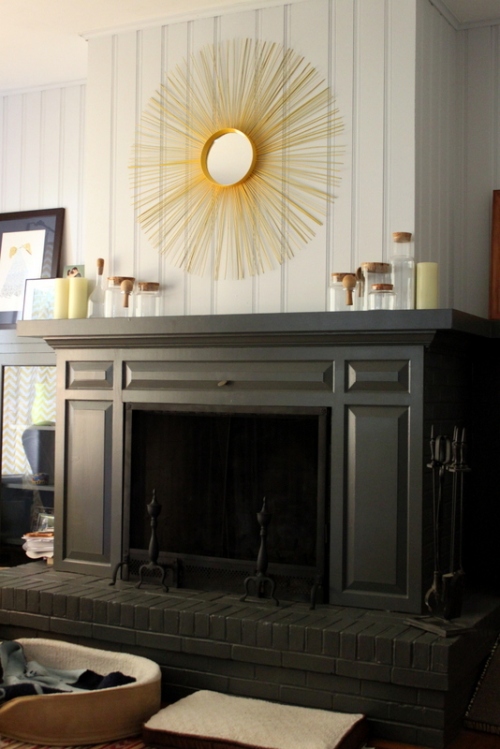
First, I decided to tackle a sunburst mirror for over the mantel.  After perusing Pinterest, I decided I liked this style best from the House of Fifty blog and got to work.  I was able to find a four-pack of circular mirrors from Target, and I selected the best one.  Then, I bought two big bunches of sticks in the floral section of Michael’s.  I decided to use the biggest mirror in the pack, which is about 9.5 inches in diameter, and measured the space above the mantel to figure out how long the sticks should be.

My mirror was a little different from the one in the tutorial in that the frame doesn’t have a flat rim; it comes to a really narrow point, so I had to glue my sticks to the back.  I got my pruning shears out, held bunches of sticks at a time against a yard stick, and clipped all of the sticks to 16.5 inches.  (The tutorial suggests varying lengths, but I did mine all of the same.)

I then put an X in painter’s tape on the back of the mirror, used the next smaller mirror to draw a circle on the back about 1 inch in from the rim as a guide, and glued my sticks in quadrants.  It took forever (Hello, Murder She Wrote marathon!), but it looked pretty cool when I was done.  I then rigged up some cardboard and painter’s tape to cover the mirror, primed it with some spray primer in the garage, and did several thin coats of yellow glossy spray paint on each side.  Ta Da!

I also painted the andirons and fire screen with matte black high heat spray paint, which I think helps them to blend in a lot better.  Lovely mantel update!

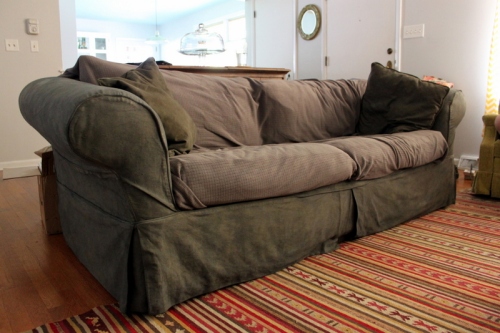
When we moved in, my mom gave us her old living room furniture, which was wonderful.  The couch is the best place for napping, but we didn’t love the light yellow color.  So, a few weeks ago I spent a whole day dyeing the sofa dark grey.  I used Jaquard i-dye in Pearl Gray, and since the entire sofa has a removable cover, it was relatively easy if time-consuming.  I used the recommended stovetop directions for all of the cushion covers, but ended up having to use the washing machine for the giant body of the sofa.  The results are okay; I’m going to buy more dye and run the body back through, eventually, to try to get a more even result.  The grey blanket is to protect the sofa from pittie and puggle fur.

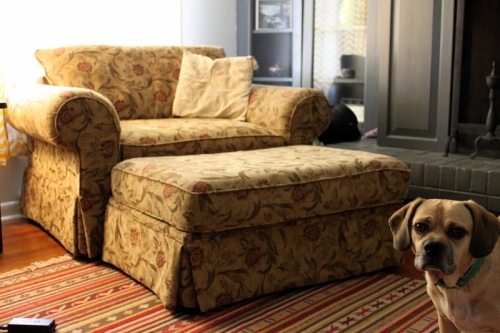
Then, this past weekend, my in-laws came down and brought us their old sofa (which we put in the basement, so it’s starting to look like a real room!), and this giant chair and a half.  It’s not the type of chair I’d ever pick out for our room, but now that we have it, I never want to give it up.  It’s so comfy!  Perfect for knitting and kitty/puppy cuddles.  I’d love to attempt a slip cover for it and the ottoman to help it match the room better, but that’s further down the road.  J and I are quite lucky in the parent department.  (Also, check out the puggle photo bomb.)

I’m also thinking we need a new rug; something brighter/more modern, maybe?  What do you think?  Have you been doing any summer upgrades lately?

Older Posts »

Categories